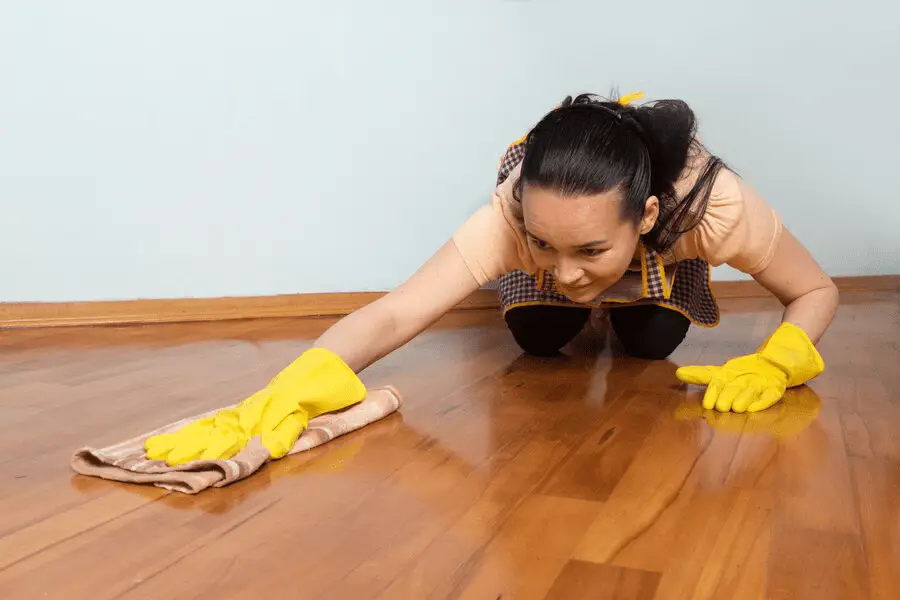
Transforming your floors is more than just giving them a good scrub; it’s about taking a plunge into the world of floor makeover through a process known as stripping and waxing. In this guide, we’ll simplify the art of floor rejuvenation, breaking down the complex steps into easy-to-follow insights. Think of it as a deep dive into the secrets of achieving that pristine, glossy finish for your floors. From understanding the basics of stripping away old layers to selecting the right products and equipment, we’ve got you covered. No jargon, no fuss—just straightforward tips to make your floors shine like never before. So, let’s roll up our sleeves and embark on a journey to unveil the hidden beauty beneath your feet.
Decoding the Stripping Process

Understanding the complex process of stripping is a crucial first step in beginning the path of floor transformation. This basic method is carefully removing old wax and finishing coats that have collected over time. Imagine it as revealing the hidden canvas beneath the surface, setting the stage for an amazing transformation of the floor. Your floors can release the last traces of deterioration by using stripping as a reset button. By skillfully removing these aged layers, you create a clean slate, ready to absorb the rejuvenating touch of the subsequent waxing process. It’s not merely about clearing the surface; it’s about revealing the potential for a revitalized, lustrous foundation that will breathe new life into your living or working space.
Choosing the Right Products for Your Floor Makeover
- Understanding Eco-Friendly Strippers: Opting for eco-friendly strippers not only benefits the environment but also ensures a healthier indoor atmosphere. Look for products that boast biodegradable and non-toxic formulations, striking the perfect balance between effectiveness and sustainability.
- Quality Matters in Waxes: Investing in high-quality waxes is the key to a durable and glossy finish. Consider wax products with advanced formulations that offer superior protection against wear and tear. High-quality waxes not only enhance the aesthetic appeal but also contribute to the longevity of your floor makeover.
- Compatibility with Flooring Material: Different flooring materials require specific products for optimal results. Whether you have hardwood, vinyl, or tile floors, choose stripping and waxing products designed to complement your specific flooring type. This ensures that the products work effectively without causing damage.
- Ease of Application: Look for products that make the application process hassle-free. User-friendly formulations and clear instructions contribute to a smoother experience, especially if you’re undertaking a do-it-yourself floor makeover project.
- Reviews and Recommendations: Before making a decision, explore reviews and seek recommendations from reliable sources. Real-life experiences can provide valuable insights into the performance of different products, helping you make an informed and confident choice.
Essential Equipment for Professional-Grade Floor Transformations
Revitalizing your floors requires more than elbow grease; it demands the right arsenal of tools for a professional touch. Here, we unlock the secrets of successful floor transformations by delving into the essential equipment that paves the way for a pristine finish.
- Floor Machines: Investing in a powerful floor machine is non-negotiable. These robust tools effectively strip away old wax and grime, laying the groundwork for a fresh start. Opt for machines with adjustable settings to cater to different flooring types.
- Specialized Brushes: Not all brushes are created equal. Specialized brushes, designed for stripping and waxing, play a pivotal role in achieving a flawless outcome. From rotary brushes to scrubbing brushes, each serves a specific purpose in the makeover process.
- Wet/Dry Vacuum: Efficient cleanup is integral to a seamless floor transformation. A wet/dry vacuum ensures you leave no residue behind, providing a clean canvas for the subsequent waxing phase.
- Safety Gear: Prioritize safety during the makeover. Equip yourself with safety gear, including gloves and goggles, to shield against potential splashes from cleaning solutions and protect your hands during the process.
- Measuring Tools: Accurate measurements are key, especially when mixing stripping and waxing solutions. Having the right measuring tools on hand ensures precision, preventing errors that could compromise the quality of the makeover.
- Buckets and Mop: Simple yet indispensable, buckets and a reliable mop are essential for applying stripping solutions and wax evenly. Opt for a mop with a durable, replaceable head for efficient and uniform coverage.

Unlocking the secrets of professional-grade floor transformations hinges on having the right equipment. Invest in quality tools, and you’ll find that the journey from worn-out to wow-worthy floors becomes far more accessible and satisfying.
Step-by-Step Guide: Transforming Your Floors with Precision
Taking on a floor makeover project is a thrilling way to bring your living area back to life. Our comprehensive guide is your reliable partner, making sure every stage of the makeover is a smooth and fulfilling experience.
Phase 1: Stripping Away the Old Layers
Begin the transformation by stripping away the old layers of wax and finish. Utilize a high-quality stripping solution and follow the product’s instructions. This crucial step sets the stage for a clean slate, preparing your floor for the next phase.
Phase 2: Surface Preparation
After stripping, thoroughly clean and rinse the floor to remove any remaining residue. Ensure the surface is completely dry before proceeding to the next step. This meticulous preparation is key to achieving an even and long-lasting finish.
Phase 3: Selecting the Right Wax
Choosing the appropriate wax is pivotal for a successful makeover. Consider factors like the type of flooring and desired finish. Opt for a high-quality wax that aligns with your preferences, ensuring a durable and aesthetically pleasing result.
Phase 4: Applying the New Wax
With a clean and prepped surface, apply the new wax evenly using a quality applicator. Follow the recommended application guidelines, focusing on small sections at a time. This meticulous approach guarantees a glossy and uniform finish.
Phase 5: Drying Time
Allow the freshly applied wax to dry completely. Follow the product’s specified drying time to ensure the wax sets properly. Patience during this phase ensures the longevity of the finish and enhances the overall durability.
Phase 6: Buffing for Brilliance
Once the wax is dry, buff the floor to reveal a brilliant shine. Use a buffing machine or a soft cloth for manual buffing. This final touch adds a luxurious luster to your rejuvenated floor, completing the makeover process.
Armed with our all-inclusive guide, take on your floor makeover and watch as your area is transformed into a sophisticated retreat. Every stride is a deliberate march toward flooring that is timeless as well as stunning. Savor the experience of discovering the undiscovered beauty beneath your feet!
Troubleshooting Tips: Navigating Challenges for a Flawless Finish
There may be obstacles to overcome while starting a floor makeover, but don’t worry—we’ve got your troubleshooting guide right here.
- Uneven Wax Application: Achieving a uniform wax coat is an art. If you notice unevenness, revisit your application technique. Ensure consistent pressure while applying and consider using an applicator for a smoother finish.
- Lingering Residue: Stubborn residue can tarnish your efforts. To combat this, increase the stripping solution’s dwell time, allowing it to penetrate and break down old layers effectively. Scrubbing with a stiff brush in problem areas can also aid in residue removal.
- Streaks and Cloudiness: Visible streaks or cloudiness post-waxing? Adjust your wax application method. Use a clean, lint-free cloth or applicator pad, applying the wax in thin, even layers. Buffing between coats can help eliminate streaks.
- Insufficient Drying Time: Rushing the drying process can lead to a subpar finish. Ensure ample drying time between stripping, waxing, and additional coats. Adequate ventilation expedites drying, contributing to a glossy and durable result.
- Choosing the Wrong Products: Mismatched products can cause compatibility issues. Always check compatibility between stripping and waxing products to ensure a harmonious chemical reaction, preventing unwanted side effects.
Addressing these troubleshooting tips with precision will elevate your floor makeover, ensuring a flawless finish that stands the test of time. As you troubleshoot, remember, that patience and attention to detail are your allies in the pursuit of a brilliantly transformed floor.
Maintain the Elegance: Tips for Rejuvenated Floors
- Initial Caution: Be patient in the first weeks after the makeover. Let the wax cure before heavy foot traffic to establish a durable foundation.
- Daily Care: Adopt a daily routine of gentle dusting and cleaning using a soft broom or microfiber mop. Preserve the glossy finish with minimal effort.
- Gentle Cleaners: Use mild, pH-neutral cleaners to avoid damaging the wax. Harsh chemicals can strip protective layers, diminishing the brilliance over time.
- Furniture Pads: Prevent scratches and dents by placing furniture pads under heavy items. This small investment safeguards your flawless floors.
- Periodic Touch-ups: Assess wear and tear periodically. Apply a new layer of wax when needed for continuous protection and a consistently vibrant appearance.
Expert Insights: Navigating Floor Makeovers Like a Pro
Transform your floors with confidence, whether you’re a DIY enthusiast or opting for professional services, by tapping into expert insights. For the DIYers, meticulous preparation, quality products, and patience are paramount for a professional finish. Alternatively, professionals bring commercial-grade equipment and experience, ensuring a flawless outcome with efficiency. Both paths converge on the importance of regular maintenance, guaranteeing that your revitalized floors radiate charm and elegance for the long haul. Let these expert tips be your guide in the art of stripping and waxing for a truly transformative floor makeover.
Conclusion
At AFC Floor Care, we believe that our guide, “Floor Makeover 101: A Deep Dive into Stripping and Waxing,” serves as a comprehensive roadmap for transforming your floors. Whether you’re a DIY enthusiast or seeking professional services, our expert insights provide the key to unlocking the true potential of your spaces. As a dedicated team in Tampa, Florida, our commitment is to empower you with knowledge and offer top-notch services. Contact AFC Floor Care at (813) 933-6049 to embark on a journey toward floors that radiate lasting charm and sophistication.
